
Over the past six months I have been working towards a project that, at times, has felt a little like hiking in flipflops. Last fall I submitted an application to the Victoria Print Society‘s PRINT gallery call for proposals. My project idea involved creating prints of British Columbia’s north coast using embossing and linocut.
Looking back now, this seems like a long time ago—the start of a journey. The past few months have been a flurry of printmaking tutorial videos, linoleum shaving bits (on the table, in my pockets, in my purse… I am sure I will be finding them for months to come), conceptual location research, and developing relationships with some incredible, local printmakers.
I made more mistakes than I care to admit here. Having to do and re-do until getting things right. These are the things that help me learn and grow. These are the points I look back on now with a smile when I think about the process. I thought I would share some of my process here with you as printmaking has been a learning curve for me and something I have enjoyed stepping into.
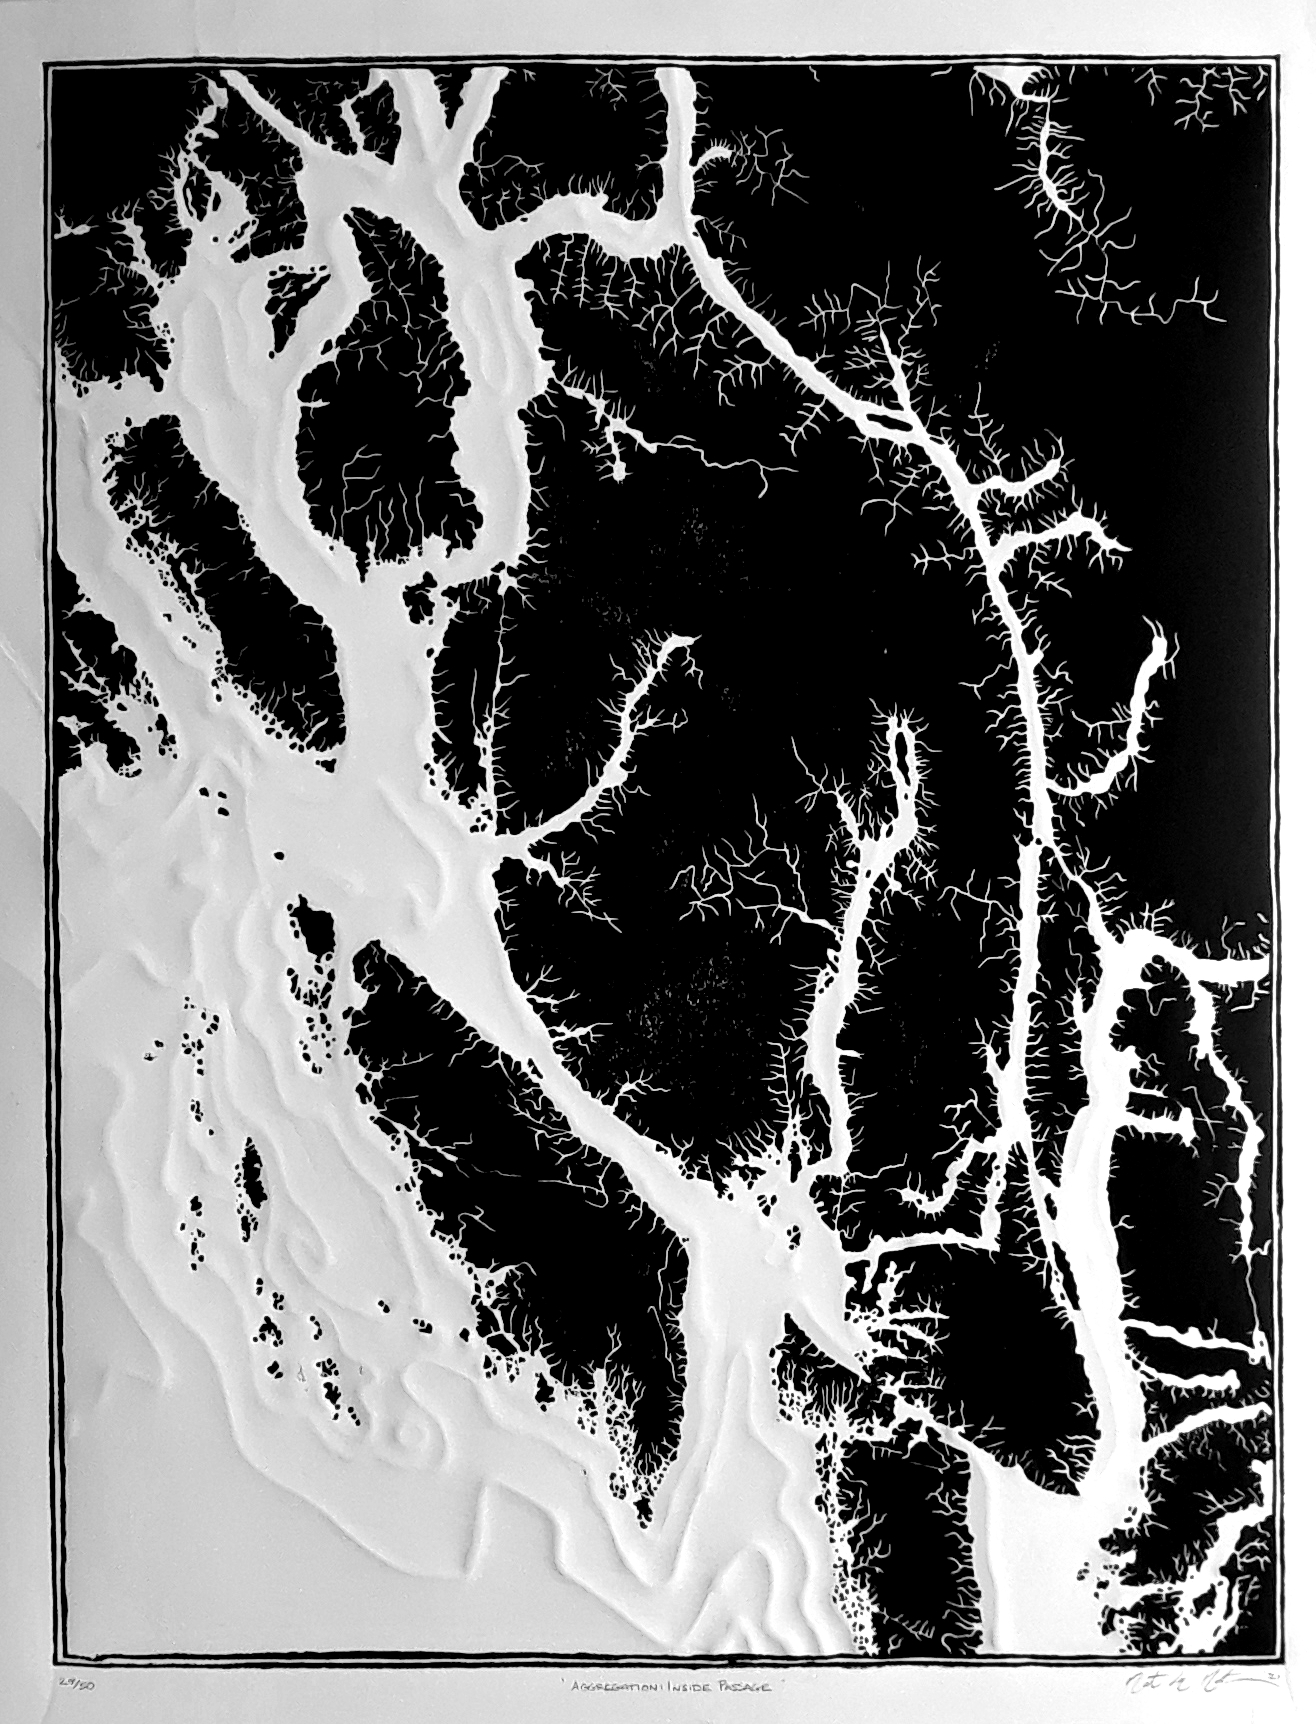
For images of my print, ‘Aggregation: Inside Passage‘, and to read about my concepts behind the work, please click here.
PRINT gallery

What is the PRINT gallery? The PRINT gallery is a printed “venue” for print artists to show and talk about their work, to help make printmaking more accessible to the public. It is printed in a brochure format that unfolds to reveal a full-page image inside of the feature print created by the artist. 50 brochure are left blank on the inside for the artist to then create a hand-pulled, limited edition print series. The digitally printed copies are free and the hand-pulled originals are available for $15 each (or $10 if you are a PRINT member).
If you are interested in ordering either type of PRINT gallery, please click here.
My Printing Process
My print journey started when my boss gave me some pieces of orange linoleum from an old apartment building.
I started by researching the design I wanted to carve. Using a variety of map and chart sources from the internet I was able to isolate the area of coastline I wanted to portray. The location I chose is where the Inside Passage intersects with the entrance waters heading towards Kitimat.
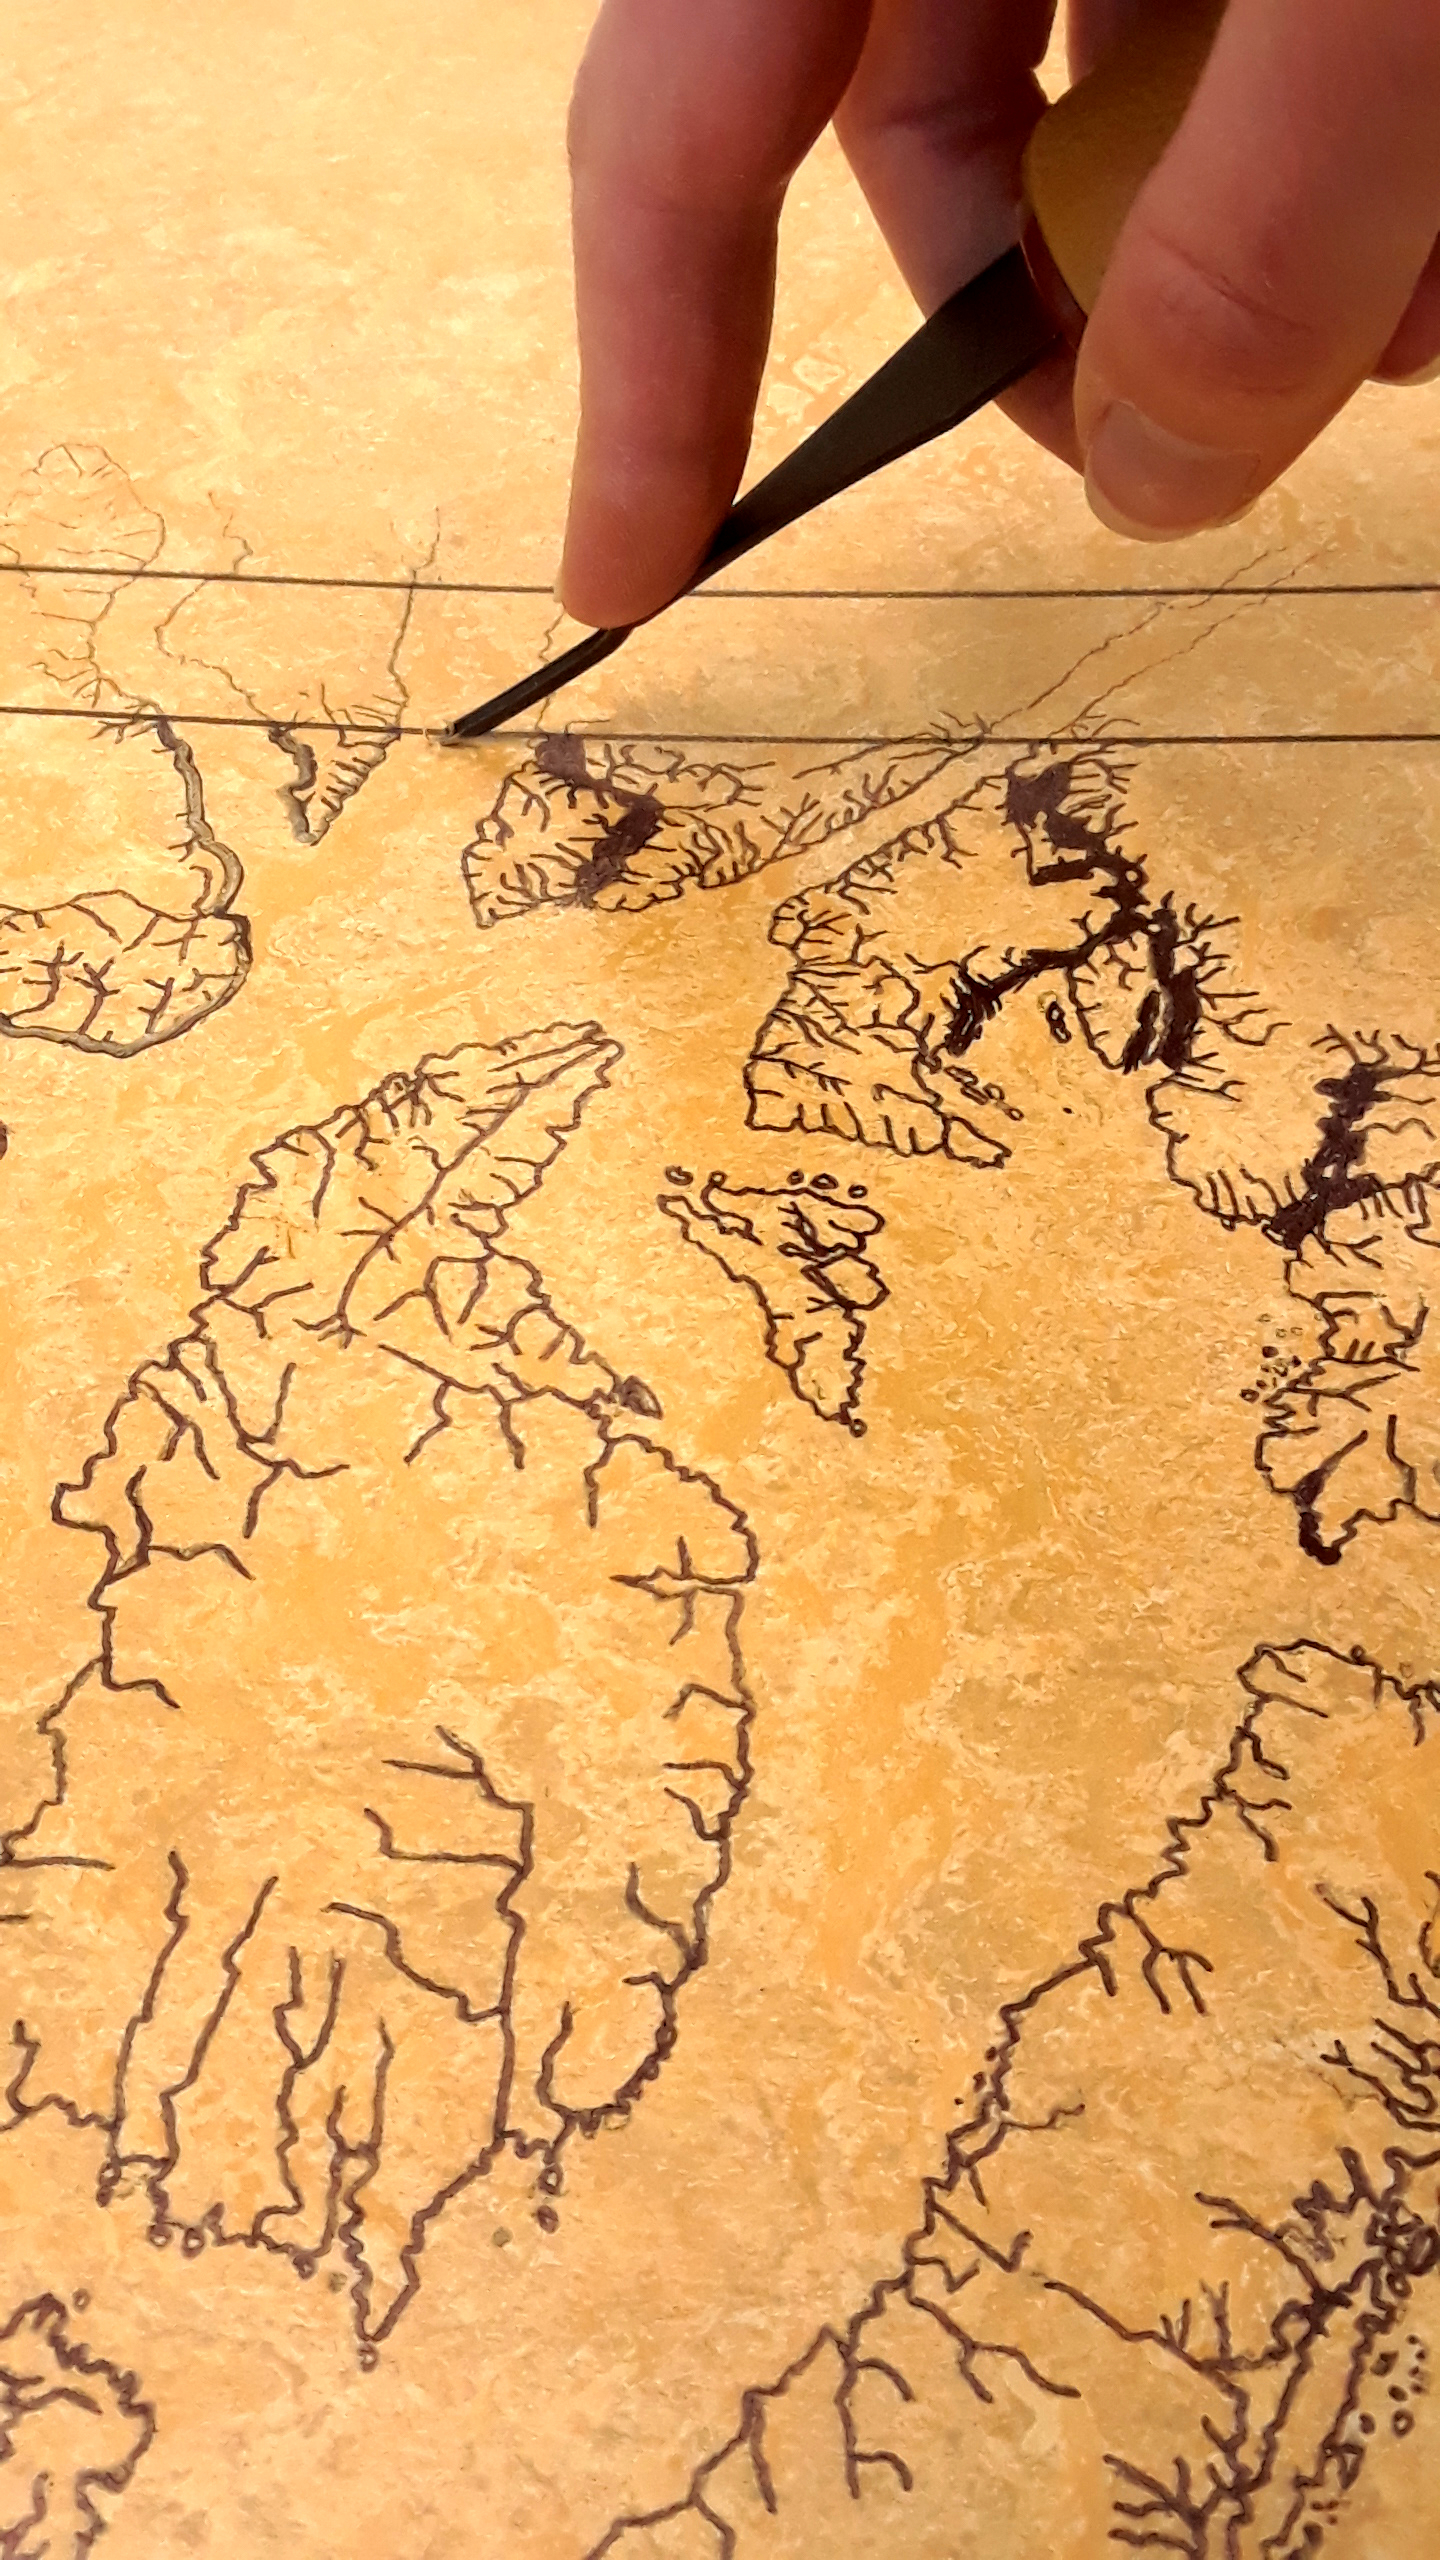
I used graphite transfer paper to lay out my design. It didn’t take long before I realized that the image will be reversed when it is printed. I then had to mirror my design format before drawing it onto the lino so the final print would be the correct orientation.
Once the design was transferred, I re-drew the lines in permanent marker so they wouldn’t rub off while I was carving. Then I made decisions about where I would cut and what areas I would leave. I decided to cut away the water areas and leave the land forms. When printing in this way, the areas that are carved away will be left the colour of the paper, while the areas that are left will hold the ink and transfer the colour onto the page.

I cut my lino block to size with a utility knife so it would be easier to handle and then started carving. It was tough work and I quickly realized how important it is to sharpen the carving tools often. This process is labour intensive and it took me a few months to complete (among my other projects). I started by edging around the land forms and then carving out, into the water areas. Once everything was roughly carved, I then went back again, and again, to continue smoothing out ridges and bumps. The final steps were to complete the small boarder around the edge, cut away the excess lino around the sides and carve away the delicate river systems that lead to the ocean. Carving is hard work and it is important to take breaks for your hands and wrists. When the lino is warmer it becomes softer and easier to cut.
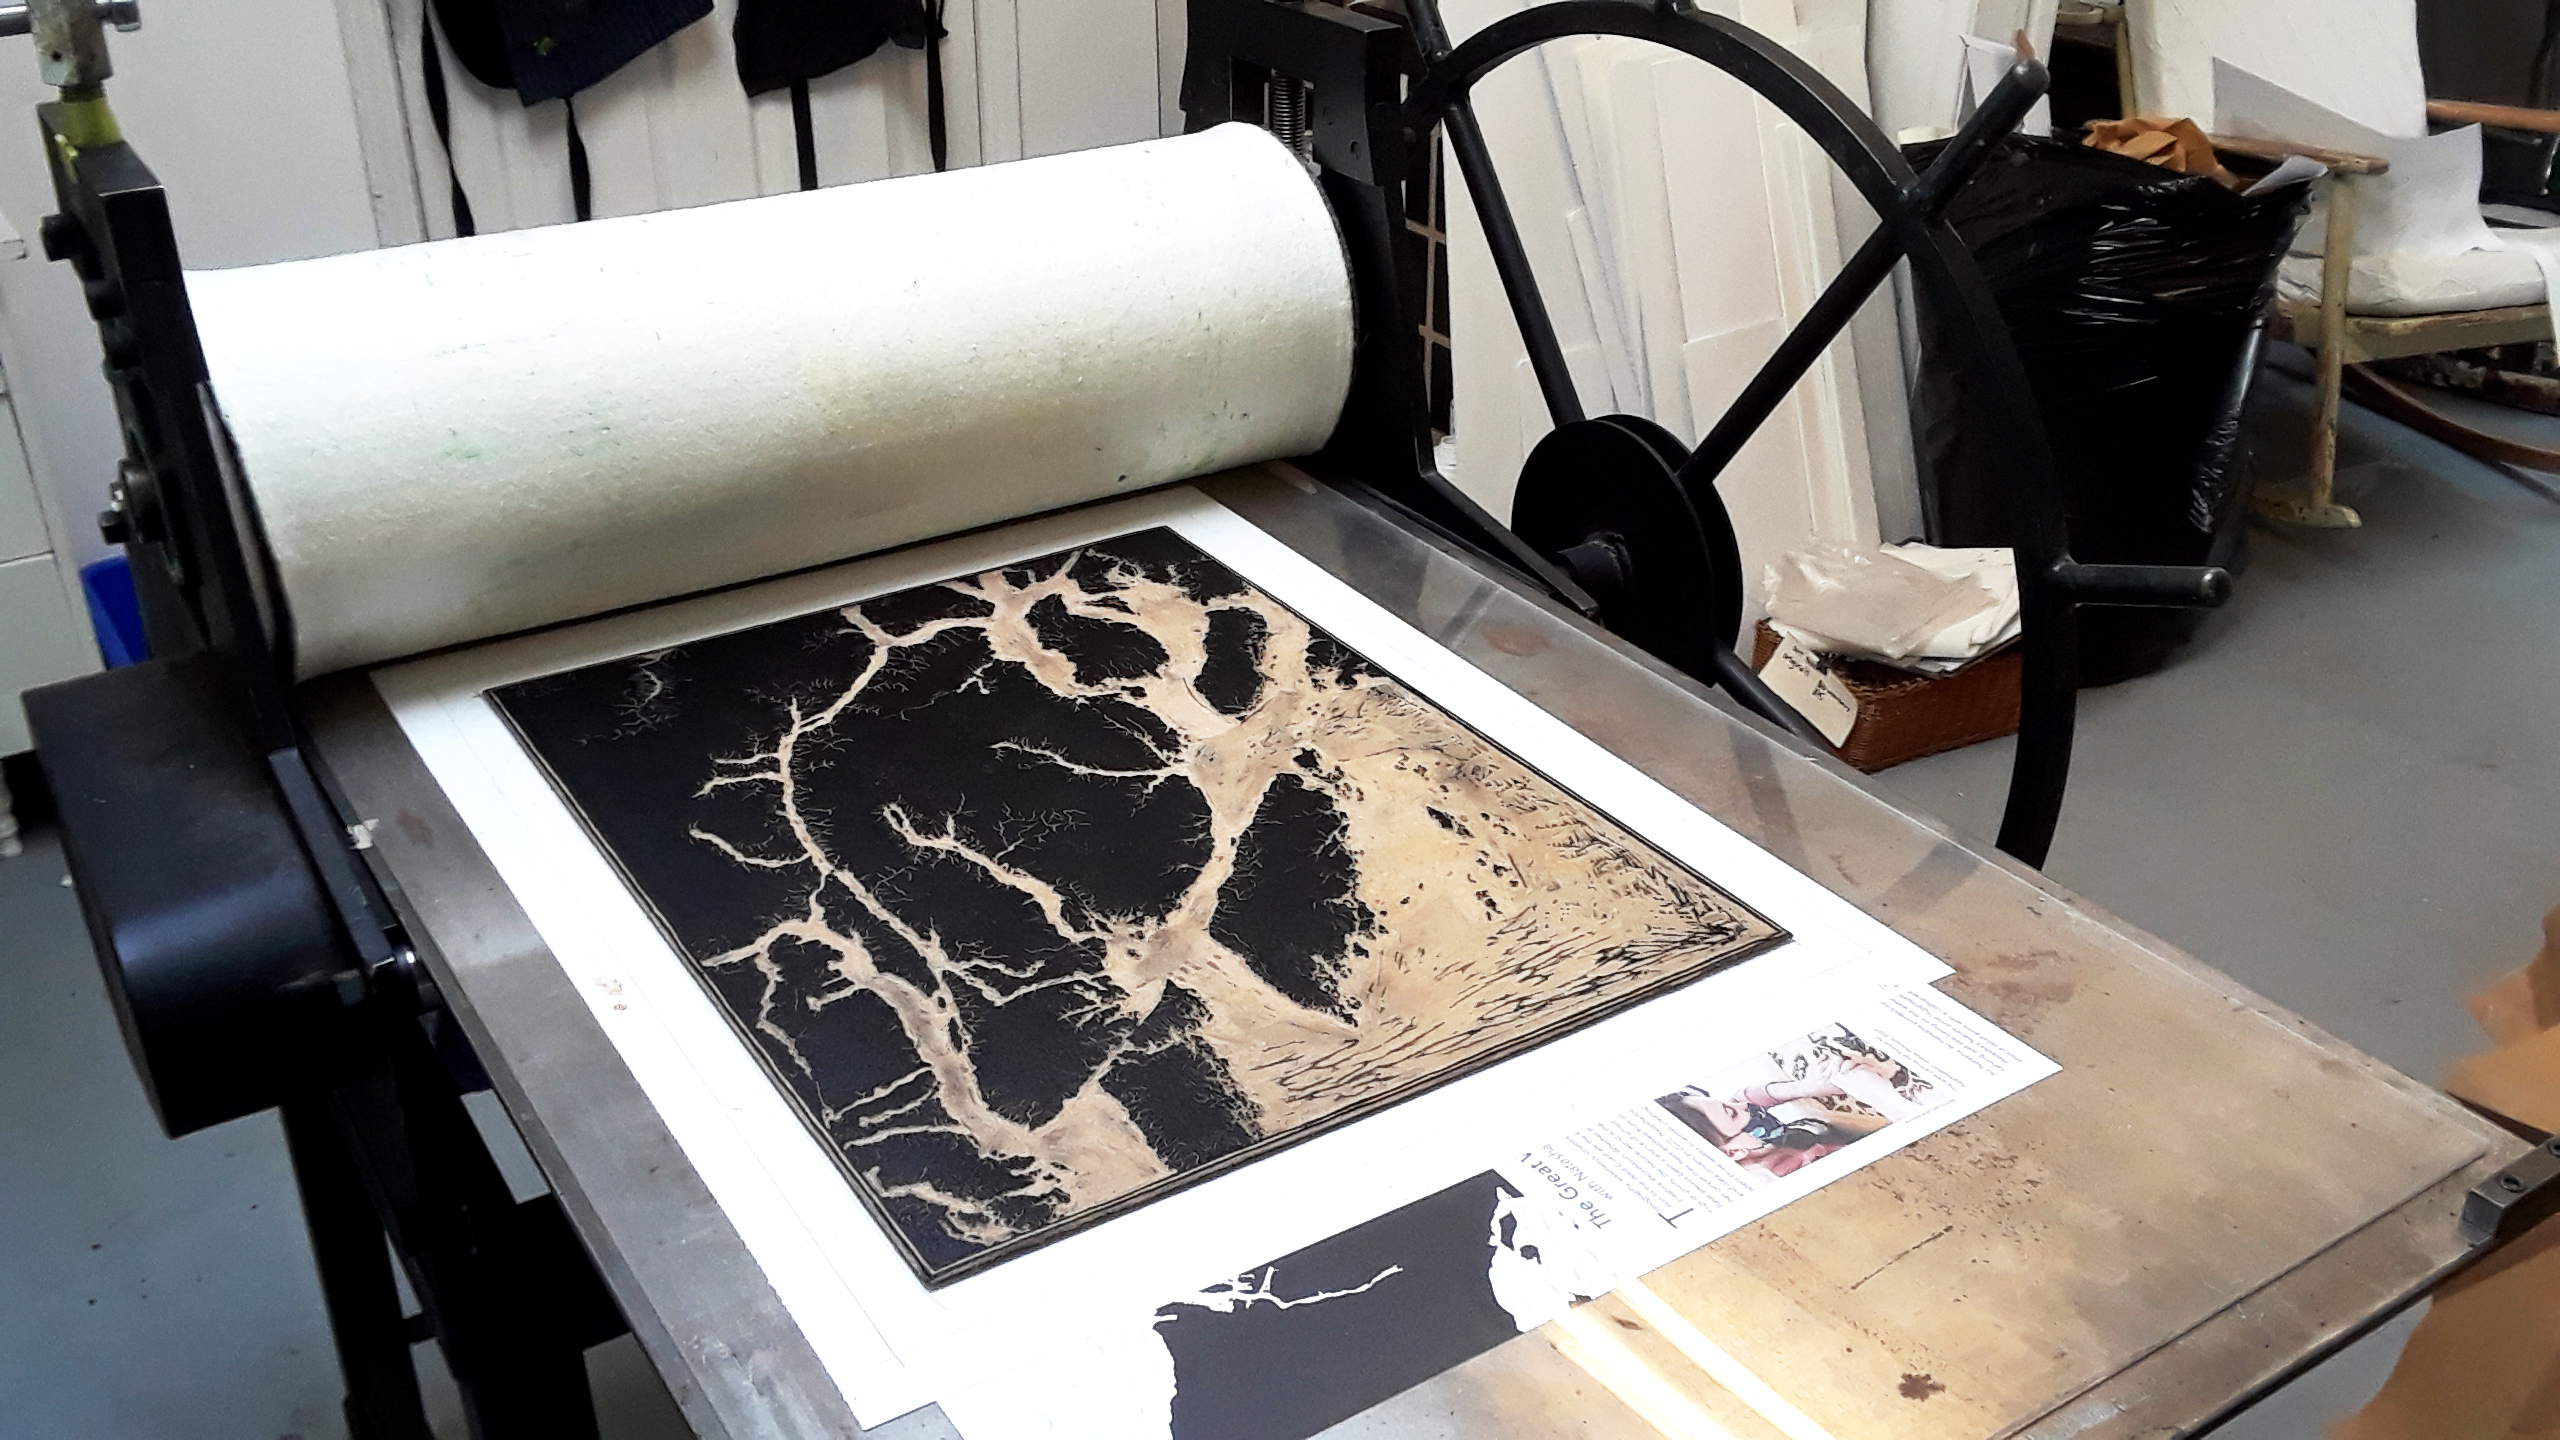
Once the plate was complete, I created a test print to check and see if any areas required more carving. After making the final adjustments to the carved lino plate, I was ready to move into the printing studio. I am incredibly grateful to Alison, Desiree and Tara, the founders of PRINT, for their support, for getting me get set up in the studio, for assisting me with the printing process and for sharing their knowledge and printing passion with me.
Before trying printmaking myself, I used to think it must be a pretty straight forward process. After all, now that my plate is made the hard part must be done. Not quite. Even when using a press, it is still a human process. I was surprised how much sensitivity one must have towards the press. The pressure is adjusted by manually tightening both sides of the roller independently. Being able to “feel” the tension, make sure the pressure is even and that it is not too tight or too light.
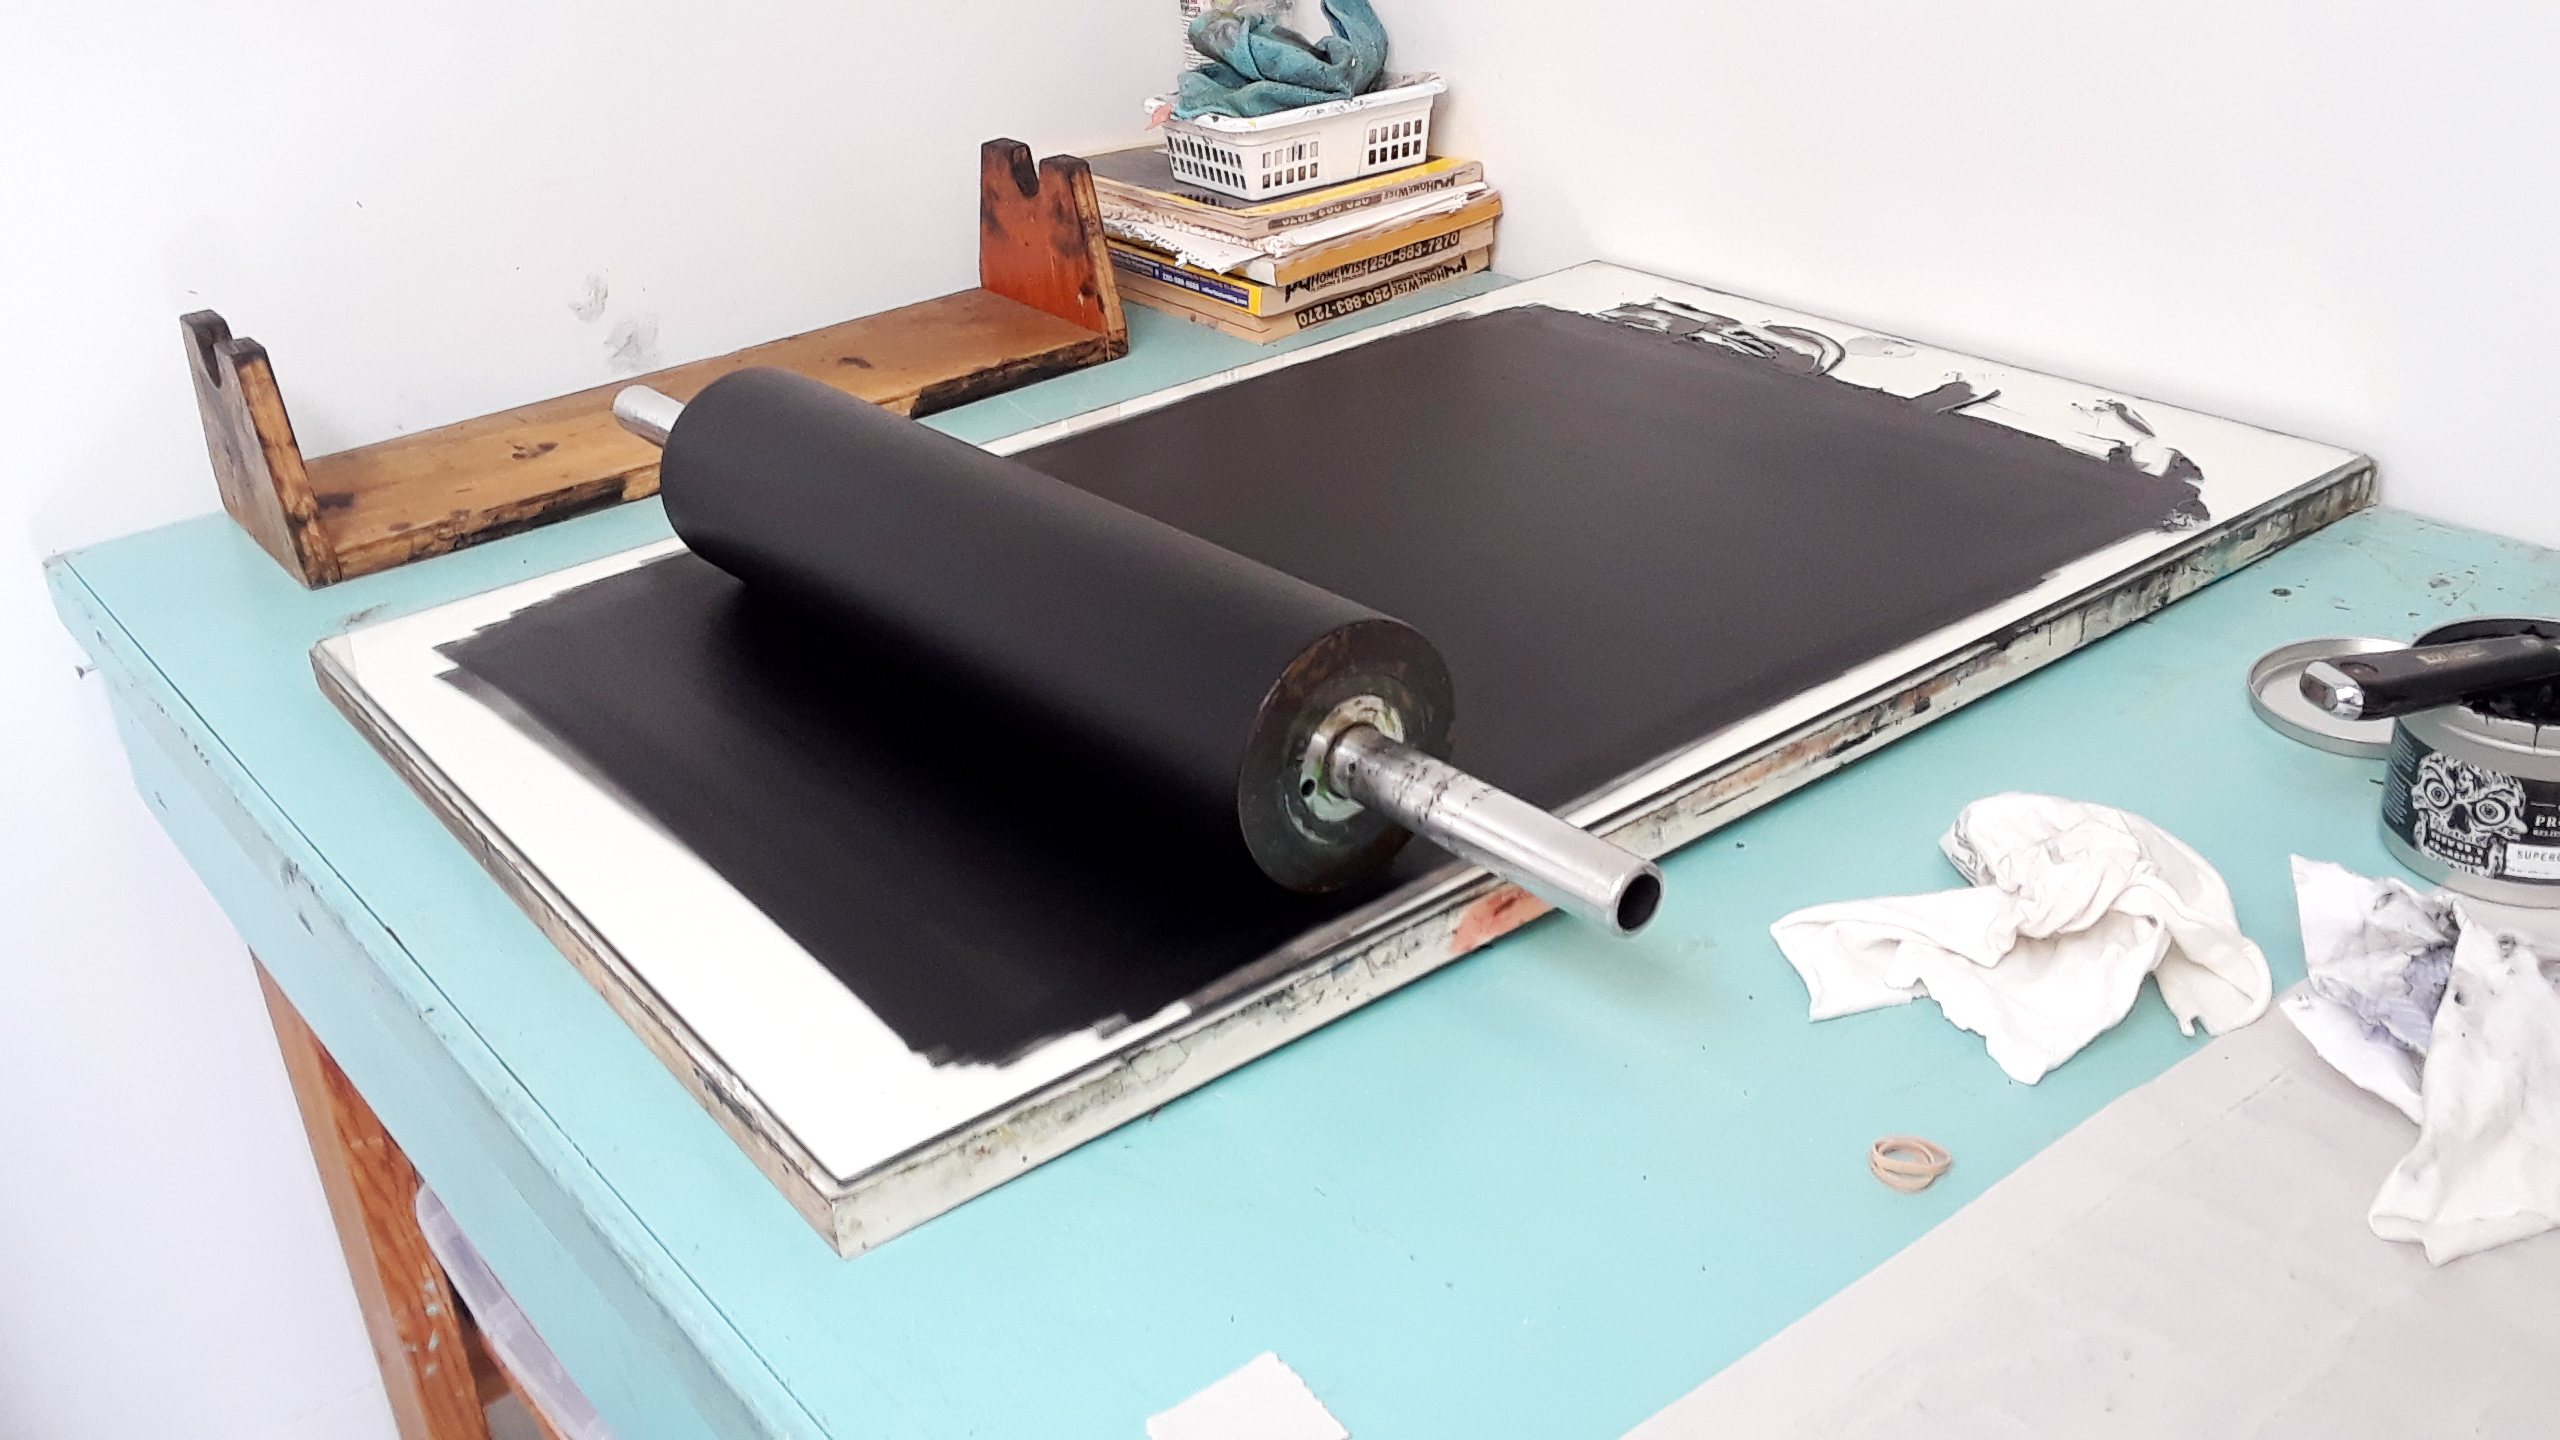
Then there is the inking of the plate. Again, sounds fairly straight forward, but I quickly learned this means more than just coating the block with ink. When you load the roller, one must lift the roller between going back and forth to allow the roller to spin and get even coverage. To load it properly there is a particular sound you want the ink to make as the roller passes over it and a special texture/gloss that you are looking for. Again, it comes back to getting the “feel” for it. This took me a few days before getting comfortable recognizing the signs.
At this point I thought it would be time to start pulling prints. The time I have eagerly been waiting for and have spent months preparing for! Well, not exactly. Printers often pull 5-10 or more test prints before pulling an actual print. Every time carefully loading and reloading the roller, covering the plate this direction, then that. Moving the plate to the press, delicately laying down the paper on top, then covering it with soft wool blankets, and pulling it through the press. All the while trying to keep everything clean and tidy. The reason why it is important to make test prints first is that the ink builds a layer on the plate in a more even way each time it is pulled. The, when you are ready to make “real” prints, you will know the ink coverage is good.
I am very grateful for Tara’s offering to assist me when it was time to create the prints. We spent 12 hours at the studio together inking and pulling prints (and laughing, sharing stories, and listening to pod casts). I realized through this experience that this is something unique and special to printmaking—it often becomes a communal activity. People gather around the press, excited to see the print lift off the plate, brainstorming together and tackling printing issues that come up (and they do come up, trust me). There is a team spirit to printmaking. It is a quieter spirit now, only two people in the studio at a time and masked (of course), but that communal energy is there!
After the prints dried, we went back to the studio to layer the print with embossing. This type of embossing is called blind embossing, because it does not use ink. The paper is ran through the press overtop of a prepared relief plate. You can see the embossing lines in one of the final prints in the image on the left. The embossing is within the white areas, mimicking the undulating submarine contours of the ocean floor. The result leaves subtle meandering lines pressed into the fibres of the paper. This took another studio day to add to the finished prints.
After we were done, I carefully gathered the final 50 prints together to sign, title, number and date.
Some prints did not make the cut. Some I inked and pulled through the wrong direction, some I forgot to ink an island or two, some I embossed the wrong direction, and one I even printed on the wrong side of the paper (see image below). The end product of this project is a limited edition of 50 linocut and blind embossed prints, which I am proud to have created. Learning a new skill can be hard (and even frustrating), but the payback is the satisfaction of having completed it. I have been thinking about this project since last September (when I applied for the PRINT gallery). One of my favourite parts about being an artist is to create a physical “thing” from a picture in my mind, and when I look over at my neatly stacked pile of prints I can’t help but smile.


Shirley, Thank you for your thoughtful words and engagement with my process and journey! I am humbled to explore a new medium and delighted to make discoveries along the way. Thank you for your encouragement and support! =)
Hi Natasha:
How wonderfully expressive your words, and work, are! The depth of your ideas, and the complexity of components they represent, continue to amaze. The work itself is awesome,—-so thoughtful, precise, deliberate, meaningful.
To have mastered this medium is in itself impressive. But to use the medium to advance your love and respect for the ecology of this land/water mass is brilliant. I learn something new, and deeper, each time I read one of your artist statements. Congratulations, and thank you.
Thank you for your comments and kind words, Catherine! I appreciate your taking time to read about my process and engage with it. 🙂
Thank you for such a clear description of your process and how you integrate your passion research and creativity. Iyoyr process and images seems so cohesive and flows. Appreciate your dedicated focus and openness to learning new skills. Wonderful work and well articulated. Congratulations.